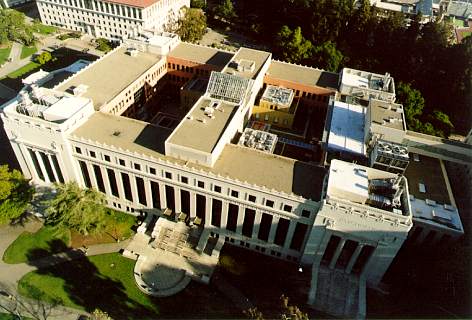
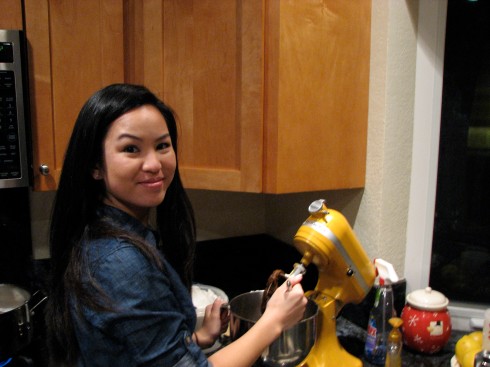
Mission Wedding Cake: Almond Cake Trial 1

22 Aug

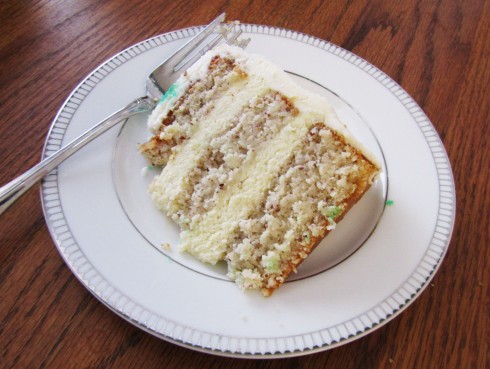
Here it is, the inaugural cake trial! In our “consultation,” Austin felt partial to the almond cake and the Bavarian cream fillings, so that is what I attempted for this first trial. It’s white, it’s triple-layered, it’s sweet, and it’s completely bridal. But I grade it a C at 75%, and I’ll tell you why!

I used a modified double batch recipe from allrecipes.com to make a six-inch and eight-inch cake. Additionally, I used information from marthastewartweddings.com to judge how long to bake each cake, how much filling was needed for each tier, and how much frosting was needed to ice the outside of the cakes. It was very accurate, except that I needed double the amount of frosting!

I must say, the cake itself turned out better than I expected! I used almond flour instead of all-purpose, and I baked it in the 3-inch deep round pans whereas the recipe called for a sheet pan. With information from good old Martha, the cakes turned out perfectly well baked–it was rich, moist, and the perfect density to be really tasty but still have enough structure to hold up two more tiers. The consistency was perfect for torting (cutting the cake horizontally into layers), and the crumb was still cake-y enough for me as well. I think I am definitely going to stick with this modified recipe for the big day! We have a winner!

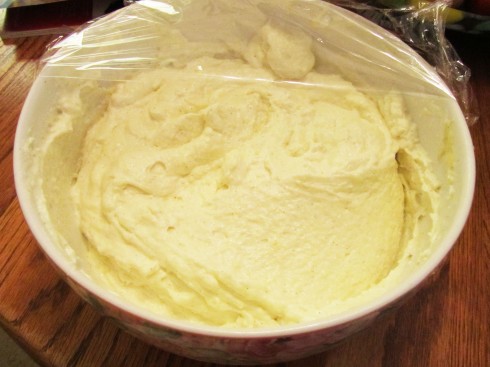
Double batch of Joe’s Bavarian Cream

On the other hand, the Bavarian cream needed some additional tuning, more or less. As you can observe from the photo, the cream was very firm, and not at all like custardy smooth cake filling to me. While this recipe would be perfect for custard molds and a spoon, it doesn’t quite serve the purpose of a cake filling very well. In my second run-through of Joe’s amazing recipe, I will definitely use less gelatin. Additionally, I also might have added more of this Amaretto deliciousness (featured below) for increased flavor. It was a little bland. When I taste-tested it in the middle of the process, it seemed like its light flavor would go well with the sweetness of the cake, but I was wrong. I know that it should have packed more punch, and a few people who ate the cake agreed.

BRING ON THE AMARETTO!

Additionally, my taste-testers and I thought that the cake needed some acid for contrast of flavor. Raspberry filling sounded awesome to me, and I think I will add that in my next trial. :) Should be pretty simple, right?

The icing, the doweling, and the stacking of the tiers went alright. I couldn’t get the buttercream frosting super smooth like the pro’s do, but I did my best, and Austin was still impressed with my sharp 90 degree edges. :) Unfortunately, I don’t have pics of the finished, uncut cake. Austin’s dad took some pictures, so perhaps I will be able to get those to you later… although I am not too proud of my icing job, so maybe I will keep those to myself, haha! My awesome future sister-in-law Emily (who you’ve read about in this post) has lent me her rotating cake stand for frosting purposes, and I am way excited to see what I can do with it!

There ya go! Lots of room for improvement, but also not a complete fail like I was half-expecting! Completion of the cake took around 6 hours. If I break up the stages, I just might be able to pull this off for the wedding! Wish me luck!

Next up: a ten-inch chocolate cake with mocha mousse filling, for the bottom-most layer of our 3-tiered cake. I am super thrilled to get started on this!

Thanks for following along with Mission Wedding Cake… Over and out!

-ATP

Mission Wedding Cake: Initiating…

6 Aug

Let me tell you, friends… It has been one great summer for me! I am thoroughly enjoying being engaged to the love of my life and planning a wedding. What other period in one’s life allows you be 100% girly? I’m just drinking it all in! The only not-fun part, as you probably anticipate, is the budget.

As you can imagine, Austin and I are working our darndest to save as much as we can, but still throw a pretty rockin’ fete. For example, when we were researching cakes we were pretty astonished at the prices and wondered what in the world we could do… Enter MWC, Mission Wedding Cake!

You guessed it, for the next several months I will be using every opportunity to practice wedding cake making. Am I insane!? Maybe a little! Some wise people have advised me that it would add a lot of stress and it might be worth it to just shell out for a bakery-made cake. It’s not that I want to ignore them, but I’ve always been more of a “do it yourself” kind of person and I want to at least try it. Heck, I even love baking, so that should give me at least a boost in the odds of success, right!?

If worse comes to worst, and my test cakes turn out to be extremely time consuming, and/or terrible-tasting, and/or horrendous-looking, I might opt to get our cake professionally done, but until then it’s full steam ahead with MWC!

I’ll be chronicling my test cakes and learning process on this blog, are you excited?! I sure am! The best possible result would be that Austin and I get a homemade, delicious cake that adds a personal touch to our wedding, and that any of you readers out there might be encouraged to try this money-saving option for your big events and parties, too! That is pretty awesome to me, so I am ready to get this party started already. Hope y’all come along!

Let’s all say a little prayer that I at least have a bit more skill than the po0r soul who made this cake. More at the famed Cake Wrecks website. :)

Of course, I’m trying to be realistic here, too! Please don’t expect to learn how to make something like this:

You might be disappointed. Just maybe. ;)

The first test cake is coming up THIS WEEK! This is my To-Do List:

  • Have a “consultation” (I get to pretend I’m a pro pastry chef) with Austin to see what flavors and fillings we think would be tasty for our guests.
  • Research recipes, sizes, servings, and styles of cakes we like.
  • Make a stop at a restaurant supply store to pick up some cheap pro tools! On the list is 2-3 new sizes of round cake pans, flower nails, cake boards, a leveler, and dowels.
  • Bake, wrap, and freeze the cake layers.
  • Make a filling and a Swiss Meringue Buttercream (this will only be my third attempt, hopefully my second success)!
  • Assemble and frost.
  • Present to the unknowing guinea pigs. :)

I predict that in the next few months, my family and friends will be inundated with cake! Birthdays, Halloween, Thanksgiving, Christmas, Showers, parties, New Year… I will bake until either I master MWC or until MWC masters me.

*cue theme music*

– Ann

P.S. I have been reading Deb‘s wonderful series on a DIY wedding cake, and it has been enlightening! If any of you have experience in this arena, please leave a comment below! I would love to hear from you!

Blueberry Pie with Basil-Infused Cream

2 Jul

What would summer be without blueberries? What would Laura’s birthday be without pie? Lackluster at most. ;) That’s why I took this opportunity to bake up something I’ve been wanting to for a looooong time–a blueberry pie filled to the brim with blueberries bursting with juice.

My goal was to make it as I tasted it before at my friends Nancy and Elliott’s house. Their pie was deep. It was running all over with sweet juice. We had to eat it in bowls! We even poured basil-infused cream over the top, creating rivers of deliciousness. It was epic, my friends, epic.

I’ve been thinking about this pie ever since Nancy and Elliott hosted a “family meal” at their house for us starving college kids. That means more than a year ago! Laura’s birthday was the absolutely perfect time to bake one up. She is pretty epic, having raised my fiance to be the most wonderful guy in the world, and all. :)

Laura is beautiful. She is kind. She is hilarious and sweet. She is devoted to loving others with fierce strength and gentle compassion. I first met her when she was helping organize our high school’s PSAT (she probably doesn’t remember that!), and now she just finished teaching my first Bible Study Fellowship class. Can you believe it?! It’s been 8 years! Throughout that time, I’ve come to know her, adore her, and look up to her as a woman after God’s own heart, who’s completely in touch with both her status as a perfect child of God, and as a humble human in need of grace.

I wanted to make this woman one EPIC birthday dessert! And knowing that she lacks an affinity for cake, but loves pie, that gave me one more reason to make this treat. You should, too! It’s a great recipe to have under your belt, it’s universally appealing, and it has a super high deliciousness to easiness ratio. Serve it with the basil-infused cream, and you’ll have fireworks (haha, get it? tomorrow’s 4th of July?!?) going off in your mouth. Whoever is around your dinner table with sing your praises with their mouths full of buttery crust and berries. Make that garble. They’ll garble your praises. :)

Flaky Double Pie Crust
2 C. + 2 Tbsp. All-purpose flour
1/4 Tsp. Salt
Pinch of sugar
12 Tbsp. Cold unsalted butter
3 Tbsp. vegetable shortening
4 Tbsp. Cold water

  1. Whisk together the flour, salt, and sugar together in a bowl.
  2. Add the shortening and the butter in 1-cm slices.
  3. Using a pastry blender (or two knives, or your fingers), cut the butter and vegetable shortening into the dry ingredients until it looks like crumbs.
  4. Sprinkle the cold water into the mixture and toss with a fork until its is moistened evenly and comes together in lumps.
  5. Gather the dough into two balls. It’s OK if one is larger than the other one; that one can be for the bottom crust.
  6. Place the balls onto plastic wrap, flatten slightly, and wrap up. Refrigerate for 4 hours.
  7. After the resting period, flour your board and rolling pin lightly, and roll out the bottom crust to about 1/8-inch thick. It should become about a 12-13-inch diameter circle.
  8. Roll the dough around the pin, lift, and bring it over the pie plate. Unroll the crust and gently ease it into the plate. Stretching it will only cause the dough to shrink back to its original when baked.
  9. Cut off the overhanging outer edges, then chill the shell in the refrigerator for additional rest while you prepare the filling and top crust.
  10. Roll out the top crust to about 10-inches in diameter in the same manner, and place in the refrigerator.

Adapted from Chez Panisse Desserts

Blueberry Filling
3 Pints of Blueberries, washed
1 c. Granulated Sugar
1/4 c. All-purpose Flour
Pinch of Salt
Juice of 1/4 lemon
1 egg for wash
1 Tbsp. cream for wash
Additional sugar for dusting (coarse sugar or turbinado sugar looks lovely)

  1. Preheat the oven to 425 F.
  2. Make sure the berries are clean and dry, and no stems remain. Toss with 1 c. sugar, flour, and salt in a bowl.
  3. Squirt the lemon juice directly onto the berries and toss again.

Adapted from Dorie Greenspan’s Blueberry Pie

Assembly

  1. Take the pie shell out from the fridge and fill with the berries.
  2. Brush the edges of the bottom crust with water, then cover the berries with the top crust. Pinch together the crusts with your favorite design, or merely press the tines of a fork all around the edge.
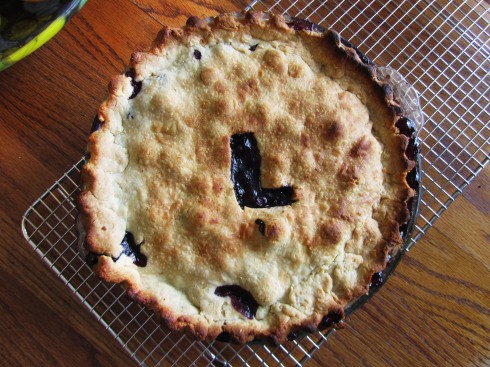
  3. Cut a vent or two in your top crust with a sharp knife. I chose an “L” for Laura. Cover the crust edges with one of these doo-dads, or with foil.
  4. Position the oven rack in the lower third slot. Place the pie on a baking sheet to catch leaks and bake the at 425 F for 30 minutes.
  5. Whisk together the egg and cream wash. Reduce the oven heat to 375, quickly (but carefully) remove the pie and its crust shield, and brush the wash over the top crust. Sprinkle the sugar garnish all over the top. Replace the pie in the oven quickly.
  6. Bake for an additional 30 minutes or until the crust is a golden brown. Remove the pie onto a wire cooling rack for at least 30 inutes before serving. In the meanwhile you can prepare the basil-infused cream.

Basil-Infused Cream
1 pint heavy whipping cream
1 c. loose basil leaves

  1. Submerge the basil leaves in the cream in a saucepan and heat over medium-low heat until the cream just begins to steam.
  2. Remove the saucepan from the heat and allow to cool.
  3. Remove the basil leaves from the cream, and taste. If it is not strong enough to your taste, add new basil leaves and use the same process (bring to just steaming again, and let cool again).
  4. Refrigerate before pouring over warm pie… HEAVEN.

Sorry, no picture of the cream! We were too busy digging in :)

<3 ATP

Happy Announcement to ATP readers :)

30 May

I usually don’t post very personal stuff on this blog, but I made an exception this time… Yes I’ve got some good news for you today. Yes, it’s been a long time coming, so it’s kind of “olds” instead of “news,” (HAHaha..) but we kind of had to make sure all our nearest and dearest were informed before I announced it here on ATP… Plus, there has been somewhat of a mad rush during the month of May to get everything squared away for both Austin’s and my medical school apps, so that contributed to the delay as well. Sufficient excuse for keeping this from all y’all? Uh can you guess what I’m about to tell you yet?

It’s true, Austin the boyfriend has been Austin the fiance for about one month now! I have been beyond excited that soon I will be ATB instead of ATP, and be able to spend the rest of my life right beside the man I love.

Moving on! For those of you who are interested in the story, keep on reading. :) You all remember when I returned from Ghana on Thursday April 26, and the San Diego Food Blogger Bake Sale on Saturday April 28? Let’s just say that was an awesome weekend, and absolutely the best way to be welcomed back home. Here’s the much abbreviated story of the weekend…

Austin and my dear mom picked me up from the airport on Thursday, after I spend an uncomfortable 15 hours on two different flights, in a very non-stretchy Ghanaian dress. Every passing minute on those airplanes I got more and more anxious to be home, see my family, and snuggle into my honey’s hug. It felt amazing jumping into his arms at the baggage claim.

Pumped full of adrenaline, I felt barely a hint of jet lag, so the first thing I did was come home with them, eat my long-awaited SALAD. Austin and I then proceeded to get two half-gallons of ice cream at Vons, indulge, and then head over to his parents’ house for a welcome home dinner later in the evening. Ghana was and always will be tugging at my heart, but right then it felt so good to be back. It was a low-key, homey affair, but it was exactly what I needed. Little did I expect what was to come later on that weekend!

Friday was spent at Pat&Oscar’s for lunch (GREEK SALAD, WHOOO!), which apparently is changing its name again to O’s… Strange? Yes. Then Austin and I hopped in the car and drove up to Julian, a little country mountain town off Ramona in North San Diego. We were so full of salad, breadsticks, and pizza from lunch, but that didn’t stop us from wine tasting at The Blue Room Winery, sharing a grand chocolate bombe for dessert at the Candied Apple Pasty Company, picking up two pies at Mom’s, choosing licorice (his) and chocolates (mine) at a candy shop, and honey tasting. It was somewhat ridiculous how full we were as we strolled around window browsing! It was an amazing day; I love doing simple things like that with Austin. The evening was spent baking(which we all know is one of my favorite things to do) and packaging maple bacon cookies (recipe post coming up!) and orange chocolate tarts for the San Diego Food Blogger’s Bake Sale, which we participated in the next day.
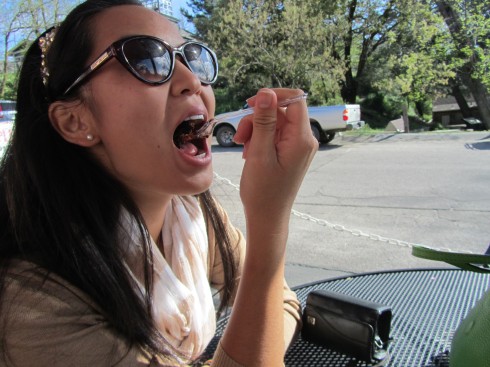
With $3034, SD Food bloggers exceeded our fundraising goal of $2500 for Share Our Strength, aĀ  charity dedicated to eradicating childhood hunger in the U.S.! Way to go, everyone! It was great to meet all the faces behind the blogs and get to know everyone a little better. I was so glad that Austin was there to support me… and take me out for some pad kee mao and Thai iced tea!

After the bake sale, we separated briefly before our special dinner date at The Marine Room in La Jolla. I serendipitously decided to paint my nails for the first time in months and get a haircut! My mom described my coif with the Vietnamese adjective that means “like a witch.” I thought it looked pretty good for having cut it myself in Ghana! I had no idea she was pushing me to trim my locks because of something very special coming up… :)

Austin picked me up, he looked studly, and we drove the scenic coastal-view route to La Jolla Shores in the twilight.

We were about 10 feet from the beach at our table, and started off with a Jameson neat (his) and a Kir Royale (mine). I think that combo is kind of hilarious. Apps were lobster bisque with enoki and a goat cheese brulee, entrees were sear scallops with carrot risotto and pork cheeks with black quinoa, and the desserts were trios of cordillera chocolate pots de creme, ginger gelato, and hibiscus lemon tarts. I put all of those down, because I know y’all would appreciate it, as food-lovin’ folks.
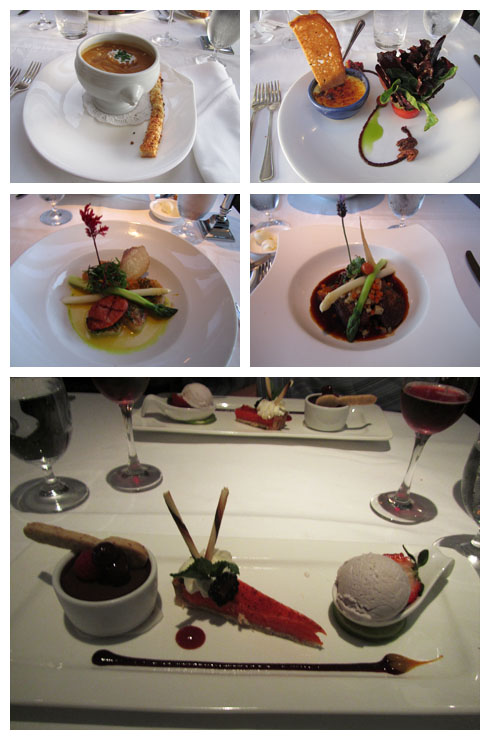
We had sat at our table for more than two hours, talking, savoring our meals, staring at the waves, and staring at each other as couples do after being separated for three long months. Finally, Austin told me that we should be getting to our beach walk, and then home quickly because his mom wanted to share her pie with us. He said we’d probably Redbox a movie and relax for the rest of the night. I sort of thought silently, “A movie, Austin? That’s kind of anti-climactic for such a romantic night,” but I was just so happy to be back with him again, it didn’t matter at all. I was unaware that it was all a decoy!

We continued the evening at La Jolla Shores beach, walking along the sand under a beautifully clear and star-studded night sky. It was a very special spot to us, because La Jolla Shores was the place Austin first asked me out when we were wee little 18-year-olds, recently graduated from high school and living a care-free summer before both heading off to Cal in the fall.

Austin took my hand, and was marching very quickly along the shore. I commented that it wasn’t as enjoyable as meandering leisurely along, and joked that he probably rented a dude dressed up in a Pooh Bear suit that was waiting for us (inside joke, hehe). He insisted it was because his mom wanted us to get back quickly so we could eat pie together. I almost suspected something, but brushed it off…

We got to the specific place on the stretch of beach where Austin and I sat and first talked about dating each other, and where we shared our first kiss. I was facing the ocean, with Austin behind me, holding me in his arms. He told me to look at the stars and close my eyes… Something was definitely getting fishy! Especially when he covered one of my eyes with his hand, and was doing somethingĀ  mysterious with the other!

And then he told me to turn around. I was shocked to see a semi-circle of glowing paper luminaries, and the silhouettes of about fifteen of our family and friends standing behind each one. That first one’s a picture of them surreptitiously hiding from us in a stairwell! They were all there to witness and help celebrate what was about to happen next. At this point, I was definitely already bawling! Austin dropped to one knee and retrieved the ring from a lantern he had decorated with flowers. He asked me to marry him in the sweetest, most romantic words I could imagine, which will always remain a special secret between us, because to everyone else around the words were drowned out by the waves.

Of course, I jumped into his arms with a resounding yes. More bawling, more laughing, more hugging of everyone around. Austin even got our friends to come down from LA to be there, and I was absolutely touched. It was the most special thing to me that they were all there, showering us with their love and support. I have the best fiance in the world.
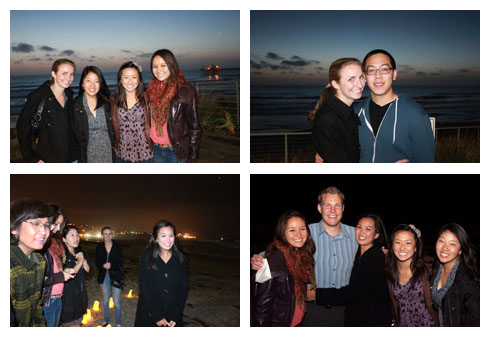
Amidst uncontrollable laughter from everyone, and a smile on my face that would not let my cheeks rest, we all got into cars and drove to Austin’s parents’ house, where a delicious spread and even more family friends were awaiting us. I was so covered with love, and it was just the happiest day of my life thus far. I was almost too overwhelmed to eat, and that never happens, that’s how excited I was! I just felt so blessed to be surrounded by the people I love, and to be looking forward to a lifetime of marriage with Austin.

A couple of my many “surrogate moms,” and two of our high school friends :)

It was a star-struck evening that I felt flew by just like Cinderella’s night at the ball. Except my prince would drive me home and leave me with a goodnight kiss to dream about as I fell asleep. Forgive me, I’m totally cheeseball-ing it up, but this is a once-in-a-lifetime thing here! I was in absolute joy, and still am a month later.

The next morning, I woke up and stared at my ring finger for about ten straight minutes in bed. Please, I know I’m not the only newly-engaged lady that did this! Then I headed over to Austin’s and from there we met up with our out-of-town friends for brunch in Del Mar at the Pacifica Breeze Cafe. It was a glorious morning, and I am so thankful to have such truly amazing friends. The rest of the day was spent calling our nearest and dearest. I could feel my dad beaming through the phone, because Austin had called and asked his permission beforehand. Some of our favorite reactions were: Austin’s old roommate dropping the phone and emitting audible shouts of joy, and our dear friend from church playing a bassoon for us over the phone. Haha! I told you our friends are awesome :)

For the past month, Austin and I have been at the AMCAS grindstone, prepping everything and researching the perfect medical schools. After submitting the primary application (very soon!), we’ll be able to start legit planning–booking venues and such. I am excited for marriage counseling at our church, and for this special season of heightened learning. I loved the book Sacred Marriage by Gary Thomas, and I am looking forward to the challenges as well as the blessings of this upcoming partnership. I know it’s going to be especially difficult for us if medical school works out, what with all the added stress, lack of sleep, and mountains of knowledge to absorb, but no matter what God presents us with, there is no one I’d rather live, grow, and love with than Austin.

-ATP

P.S. Next up on At The Patisserie, we’re turning back to FOOD! Two upcoming posts–Maple Bacon Cookies and Orange Chocolate Tarts from the San Diego Food Blogger Bake Sale! Also, let me know if there are any readers out there that may like to hear more personal non-food-related posts on here from time to time. I know I said I usually don’t post stuff like that, but I may steer the blog in an additional direction if I can’t resist sharing a few wedding deets here with y’all :)


Welcome Back from AFRICA! Vegan Spiced Chai Latte Cupcakes + Cinnamon Swiss Meringue Buttercream

17 May

This is a double welcome back from Africa!

I baked these requested cupcakes for Austin’s little sister (but she’s already 20!) as a sweet homecoming treat when she came back from her study abroad trip to South Africa last week!

You can read all about her adventures in her amazing blog here. You will be completely enthralled by her adventures cage-diving with Great White sharks, almost being blown off a cliff by 80mph+ winds, serving at a day-care, and touching cross-cultural experiences. Did I mention she met Desmond Tutu?! There’s a photo of her sidled right up next to him, shaking his hand and grinning. Adorbs. Miss Emily Elizabeth is one amazing young lady, and I love her. We are so glad to have her back at home with us.

And the second part of the “double welcome back” is my return to this blog! Yep, it’s been about 13 weeks since I posted any deliciousness here. I missed sugar so much when I was in Ghana that the first activity I did when I came back was bake up two batches of treats for the San Diego Food Bloggers Bake Sale, in support of the charity Share Our Strength. Totally cool experience, and I can’t wait for next year!

For readers that have been wondering about what I actually did in Ghana, see this post, or check out the extensive journals I wrote in my blog. In short, it was life-altering, and I have it in mind to return to little Saboba town and serve there again.

On to the the sweetness! Emily is a fan of chai lattes, and who wouldn’t be? I love their complex, spicy, exotic flavor. This version is vegan–no eggs, no milk, no butter, and therefore very dense like a muffin, but still SO delicious. Once you add the Swiss meringue buttercream, however, you can’t count the entire cupcake as vegan, . Too bads, but who’s complaining!? I may be a slightly granola Berkeley girl, but I will never give up butter… Unless my doctor tells me to, of course. Listen to your doctor, friends! Oops sorry, remnants of Saboba are still lingering with me, I guess!

Back on track! I was afraid of Swiss meringue buttercream after my first very soupy attempt, but I decided to tackle it again for the sake of Emmy’s cupcakes, and it turned out to be a success! Lesson learned: don’t let a one-time failure scare you into submission! You are the boss of the kitchen, and maybe it will take just one more try to conquer that difficult recipe. Got it? Got it. :) Now go on and try these scrumptious cupcakes!

Spiced Chai Latte Cupcakes
Makes about 16 cupcakes

2 1/4 c. Soy milk
8 Tea bags, black tea (I used Lipton yellow label, ubiquitous in Ghana ;] )
2 tsp. Apple Cider Vinegar
2 1/2 c. Flour
4 tbsp. Cornstarch
1 1/2 tsp. Baking powder
1 tsp. Baking soda
1 tsp. Salt
1 tbsp. Ground Cinnamon
2 1/2 tsp. Ground Cardamom
1 tsp. Ground Ginger
1/2 tsp. Ground Cloves
1/2 tsp. Ground Nutmeg
2/3 c. Canola Oil
1 1/2 c. Granulated Sugar
1 tbsp. Vanilla

  1. In a saucepan over medium-high heat, scald the soy milk (heat to just under boiling).
  2. Take the strings and papers off the tea bags if necessary. Remove the saucepan from the heat and steep the tea for 10 minutes.
  3. Remove the tea bags, and re-measure the soy milk, making sure that at least 2 cups remain. If there is less, you can top off to 2 cups with some fresh soy milk.
  4. Whisk the apple cider vinegar into the milk and let it sit until it is curdled.
  5. In a medium bowl, sift together the flour, sugar, cornstarch, baking powder, baking soda, salt, and spices.
  6. Pour the soymilk, oil, and vanilla into the bowl and stir until just incorporated.
  7. Fill cupcake pan with liners, and put about 1/4 c. of batter into each well.
  8. Bake at 350 for 18-20 minutes. Remove and let cool on a wire rack.

    Heat and whisk your sugar + egg white until it looks like this!

Cinnamon Swiss Meringue Buttercream

1 c. Granulated Sugar
4 Large egg whites
1 1/2 c. Unsalted butter at room temperature

1 tbsp. Vanilla
2 tsp. Ground Cinnamon

  1. In a double boiler, or a metal pan set in another pan filled with simmering water, cook the sugar and the egg whites together, whisking constantly until all the sugar is dissolved, and the mixture is white and uniform.
  2. Pour into a stand mixer fitted with a whisk attachment and beat on medium speed until cool, and forms thick, shiny meringue, about 5 minutes. I used a hand-hend Cuisinart 7-speed mixer on speed 5.
  3. Add in the butter, 1 tbsp. at a time, beating after until smooth. If the mixture looks soupy or curdled, continue beating, and it will smooth out!
  4. After all the butter has been added, beat another 6-10 minutes on medium-high. Add in the vanilla and the cinnamon.

Recipe adapted from Love and Olive Oil

All you have to do after that is frost your cupcakes! You can use the regular ole knife method, or fill a piping bag (I just use a large ziploc) and pipe it on. I myself just used a large ziploc bag-in-a-cup method. Easy and delish.

Emily and everyone else in Austin’s family, and our family friends who came to the welcome-back-Emily party just loved them. :) Austin himself said, “AH… MAY… ZING” in a text. That’s how I knew they were good enough to share with y’all. And I hope you really do enjoy them!

Make them for your hubby to say welcome home from work.
Make them for your kids to say welcome home from school.
Make them for anyone you love to say now we’re together, welcome home.

<3 ATP

San Diego Food Blogger Bake Sale!

7 Apr

Hello, hello?

Anyone out there?!

I know itā€™s been ages since Iā€™ve posted anything on this little blog of mine! I really hope there are still some subscribers or readers out there to hear these words I have for you today!

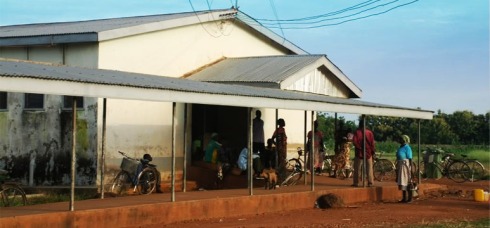
As some of you know from my last post almost ten weeks ago, I have been absent from At The Patisserie because I have been out of the country. In fact, I am posting this with spotty internet connection from a rural town in the Northern Region of Ghana! Here’s the link to my journal blog if you’re curious!

But something very important has brought me back, even as I am here (about three weeks to go in Saboba)! Itā€™s called the San Diego Food Blogger Bake Sale, and itā€™s something I am WAY excited for.

I need to tell you all about this fabulous event happening in happeninā€™ Pacific Beach, San Diego on the 28th of April at Great News! Discount Cookware and Cooking School, from 10am to 2pm. Yes, that is about 2 days after my plane touches down, but baking is one of the first things I would absolutely love to do as soon as I get back! Itā€™s been a long (but awesome) nine weeks here, and I miss my mixing bowl and oven!

Here is why you should participate!

– One in five children in America struggles with hunger. The funds raised form this branch of the National Food Blogger Bake Sale will go to Share Our Strength to help combat childhood hunger in America!

– Deliciousness. Need I say more?

– Meet new people, socialize, and network with the food blogging community in San Diego

– Have fun experimenting in the kitchen

– Show off your culinary expertise

– Or just pick up some thoughtful treats for friends and family members!

Whether you want to contribute to this collection of tasty desserts or just stop by to sample and support, we would love to see you there! If you want to get more involved, or if youā€™re curious about more information, check out the website!

This branch was started by Gaby of Whatā€™s Gaby Cooking? And is headed this year by Marie of Meandering Eats. They have worked so hard on this even in the past years, and I am sure that with our contribution from San Diego this year, we can double the amount of donations raised from $25,000 to $50,000 nationwide!

If you feel called to add to this campaign, but donā€™t have the time (all of us get super busy sometimes!), there is also the option to donate directly online via this link! Click on the ā€œDONATEā€ button to send support to the San Diego branch efforts. Every little bit counts! Together we could help a lot of hungry children! J If youā€™re in the San Diego area at the time, we would LOVE to see you there, and I would especially love to meet you all!

Love from Saboba, Ghana

Ann

P.S. More on what I am baking later! I want to make it really good, but I really only have one day to prep everything!

For the next 3 months…

2 Feb

Saboba Medical Center, during the wet season (I'll be going during dry season!)

For the next three months, I will be posting on a new blog, Serving in Saboba, dedicated to chronicling my medical mission to Saboba, Ghana. I will be volunteering and living with an American missionary named Dr. Jean Young at Saboba Medical center. She is a surgeon extraordinaire and a strong woman of God, and I am so excited to learn from her! If you like gory surgery stories, adventures, or safaris, please follow along during this time! The first post is already up!

Cadbury Fingers

31 Jan

Hello there, all!

Did you know that Ghana is the #3 Cocoa-producing country in the world? Yep, it’s right up there with the Cote d’Ivoire (neighbors!) and Indonesia. The English company Cadbury (Ghana was an English colony until 1957) is the largest producer in Ghana, pumping out tons of deliciousness every year, most of it being uber sweet milky kind.

To commemorate my trip to Ghana (less than one week left in America!), I decided to whip up a quick batch of these traditional Cadbury Fingers. Have you ever tasted them? They are my mom’s absolute favorite–she has admitted to regularly consuming a whole box after school as a little girl. I got to try them for the first time two years ago, and boy are they addictive! Consisting of a crisp shortbread biscuit cookie covered in a layer of creamy Cadbury milk chocolate, and in pinkie-finger-size form, I can definitely see how easy it is to eat a dozen no problem. ;)

Stock Photo from foodireland.com
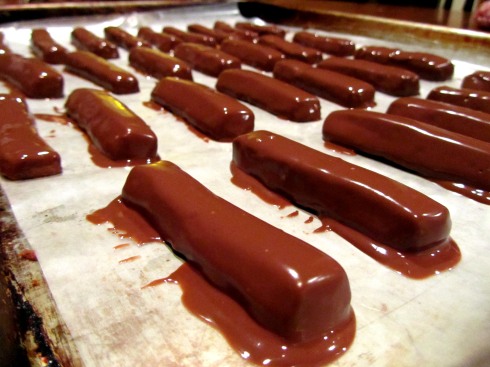
Of course, they were so much easier to purchase in England, and are common imports to France, but here in America you rarely see them at the grocery store. I find them (and more Cadbury chocolate, and more international treats) at World Market in my town. As a special treat or a way to say “I love you” to my mom, I pick up a box on occasion. Do you have a World Market near you? They’re almost the best things ever!

This homemade version I adapted from a traditional shortbread recipe is quite delicious, if I do say so myself! They are slightly more buttery and rich than the store-bought ones, because of the recipe and because they are about twice as big, but who’s complaining? :) They consist of about 5 ingredients–butter, flour, salt, sugar, and Cadbury chocolate so they are super simple and easy to make!

Here’s the step-by-step–full recipe at the bottom!

First cream the room-temperature butter in your mixer (hand-held or standing). In a separate bowl, mix together the flour, sugar, and salt. Add it to the creamed butter and continue mixing until it forms a dough.

Ball up that dough and turn it out onto a clean floured surface. Flatten it out into a disk with your hand and flour the top. Roll out to an even thickness, about 1/4 inch.

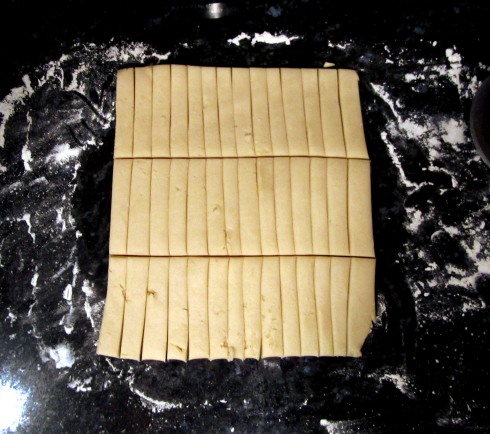
Use a pizza cutter or another such device to square off your edges. Cut finger-sized rectangles out of your square.

Place those suckers on a cookie sheet and bake for about 10 minutes at 350, or until lightly browned on the top.

Cool them on a wire rack

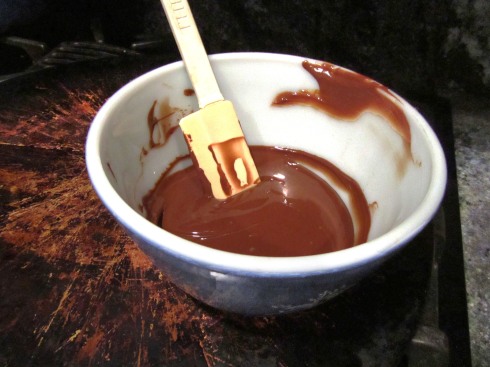
Meanwhile… melt some milk chocolate in the microwave! For these fingers specifically, Cadbury would be best, but whatever you have is fine, too! I actually want to make these again with super rich dark chocolate. :)

When your babies are cooled, take a fork and sink them into this chocolate, like they’re Augustus Gloop in Willy Wonka’s chocolate river. If you didn’t think he was the luckiest kid of the bunch, I don’t know where your priorities lie.
Oh, and tapping the fork against the edge of the bowl helps to drip the excess chocolate off the cookie.

Place them on a baking sheet lined with wax paper and stick them in the fridge for a little. Resist the temptation to touch or lick!

They’ll come out looking deliciously smooth. In the middle they are SERIOUSLY buttery, crisp, and delicious! These were a perfect after-school snack for my mom, and a perfect anytime snack for me!

Cadbury Fingers
2 c. All-purpose flour
2/3 c. Powdered (confectioner’s) sugar
1/4 tsp. Salt
3/4 c. Unsalted butter, room temperature
About 6 oz. of Cadbury milk chocolate

  1. Ā Cream the butter in an electric mixer. Preheat the oven to 350.
  2. In a separate bowl, mix together the flour, sugar, and salt.
  3. Mix in the dry ingredients with the butter until it forms a dough.
  4. Turn out the ball of dough onto a floured surface and roll out to 1/4 of an inch thick.
  5. Square off the edges of your dough and continue by cutting finger-sized sticks out of the dough. I cut out about 42 little fingers, and the rest of the edge dough I used for traditional shortbread wedges.
  6. Place the fingers on a baking sheet and bake for about 10 minutes on the middle rack, or until lightly browned.
  7. Cool the fingers and melt the chocolate in the microwave in a deep bowl.
  8. Using a fork, completely submerge the fingers in the chocolate. Tap the fork on the side of the bowl to drip the excess chocolate off the finger.
  9. Place the fingers on a baking sheet lined with wax paper and refrigerate until the chocolate has set. Store in an air-tight container in the refrigerator or at room temperature.

The deliciousnes to easiness ratio of these cookies is SKY-HIGH, people. Make them tonight for your little taste of Ghana! Your roommates/parents/significant other/dog will thank you immensely.

-ATP

I’LL BE BACK…

27 Jan

Greetings y’all,

I just wanted to say thank you to everyone who has put up with my month-long hiatus and supported me during my MCAT cramming time. Your patience has been much appreciated :)

Well, the big day is TOMORROW at 1pm! I am so excited to have time to finally post something delicious after this exam (epic birthday cake and a lot of other treats coming up), to get all this testing stress over and done with, and to pretty much finalize all the things I am preparing for my application… except for one thing!

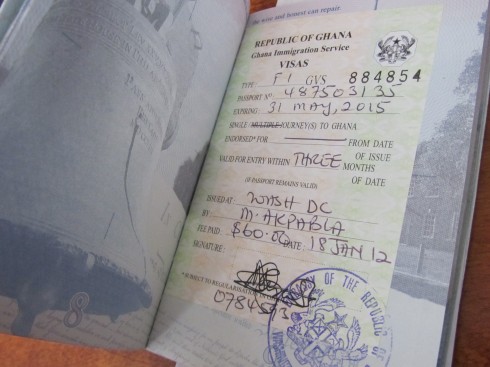
As many of you know, I’ll be jetting off to Ghana on February 7 for a medical mission! This plan has been in the works for quite a long time, and if I really reflect, even to the point of four years back! God is good all the time. I am so grateful for your prayers and other means of support and will continue to be throughout the trip.

I promise that in between Sunday and when I leave, there will be lots of yummy things up on this blog to ogle/drool over (or is it just me?). There will also be a personal blog devoted to sharing my experiences in Ghana with you, if you are at all interested. :) I will link up as soon as it’s created!

And when I’m back in San Diego I will have even more than 10 days to bake, take photos, EAT and write!

Me da wa se (as they say in Twi)!

or Thank You :)

Gingerbread Valley Life Sciences Building

19 Dec

This Christmas season, I haven’t had as much time to do all the baking or cooking that I would have liked. I was planning on making a towering cake, mixing a festive cocktail, trying my hand at decorating sugar cookies with royal icing, and assembling large batches of other treats to give out as gifts, etc. Sadly, with the MCAT looming, I’ve had a hard time justifying time spent on things other than studying (even blogging makes me feel guilty)! That’s what I felt so lucky that I did get the chance to spend some time with my boyfriend and his sister constructing this awesome gingerbread house!

I know my readers mostly consist of my friends from college… So does this structure remind you of anything? I’ll give you a closer look…

Why yes, bravo! This is indeed a small model of Valley Life Sciences Building, fashioned in gingerbread. This building is where I spent most of my days–either in class, lab, office hours, or the Biosciences library (perfect spot for studying). Even the pre-med chapter of American Medical Student Association met in this building for our evening meetings! My boyfriend was a different major, so his department was in another building, but he was still here very often even when fulfilling all his pre-req’s.

Both of us being recent graduates, and missing our alma mater and all the wonderful people we don’t get to see anymore, this tribute to VLSB in gingerbread form seemed quite fitting. What do you think–should I email a photo of our masterpiece to Chancellor Birgeneau? Or are we just waaaaay to nerdy for our own good?! Comment below and state your opinion!

This is how we started the project! The first step was making the dough. With a few modifications, I used a gingerbread recipe from King Arthur Flour, a trusted resource for aspiring bakers like me!
First, heat the butter and milk until just melted. Then whisk in the molasses, brown sugar, and egg.

While you’re waiting for the butter to melt into the milk, whisk together some of the flour, salt, baking soda, and the spices.

Next, you want to pour the liquid mixture into the bowl, and using a STRONG electric mixer, add in the bowl of dry ingredients. The dough becomes really thick, so I am really grateful that I got to bake the gingerbread at my boyfriend’s place, which has a Kitchenaid.

Continue adding the additional flour until you reach a play-doh like consistency. Once all the flour is just incorporated, turn out the dough onto plastic wrap and form it into a disk. Wrap the disk up and let it rest in the refrigerator for about an hour.

Once you’ve patiently waited an hour, roll out the dough to about 1/8 inch thickness. Based on our rough estimate of the ratios of VLSB, and how many square inches of dough we had, we went for a building that measured 12×6 inches (golden rectangle)! After you’ve done some similar planning, cut out the shapes of the walls, roof, and other architectural adornments. :) We had 38 separate pieces of gingerbread of all different shapes and sizes to match the basic outline of VLSB!

Pop those in a 350 degree oven, and wait 15 minutes! These cookies don’t spread much, so it’s OK to place them close together on the baking sheet. Additionally, the larger pieces baked to the same hardness as the smaller pieces, so don’t worry about varied baking times. :)

Gingerbread for Gingerbread House
Makes about 450 square inches, rolled out to 1/8 inch thickness

3/4 stick. Unsalted Butter (6 tbsp)
3/4 c. Milk
1 c. Brown sugar
1/2 c. Molasses
1 Egg
5 c. Flour
1 tsp. Baking soda
1 tsp Ground ginger
1 tsp. Nutmeg
1/2 tsp. Salt

  1. Melt butter and sugar together
  2. Add molasses, sugar, and egg
  3. Transfer to bowl of mixer and incorporate 1 c. flour, spices, salt, and baking soda.
  4. Gradually add the rest of the flour until just incorporated
  5. Turn out dough and form into a disk. Wrap in plastic wrap and let rest in the refrigerator for 1 hour.
  6. Roll out to 1/8 inch thickness, and bake on 350 for about 15 minutes.

While the gingerbread is cooling, whip up a batch of easy-peasy royal icing. This icing is the perfect consistency for constructing a gingerbread house because it is quite sticky and dries relatively quickly. That means you don’t have to be concerned about your building collapsing, as long as you’ve held the pieces in place for maybe 20 seconds, and the walls have another structure to attach to other than the ground. Make sense? For example, there would be a reduced risk of a vertical wall falling down if it also had an an adjacent wall that it was glued to. Free-standing vertical walls? Meeeh, not so much.

I don’t have photos of making the icing or the process of erecting Ginger VLSB (my new name for our magnum opus), but it’s pretty simple!

Royal Icing for Gingerbread House
makes just enough for one Ginger VLSB, plus maybe 1/2 c. extra (so accurate, my measurements)

3 Egg whites
1/2 tsp. Cream of tartar, or other egg white stabilizer (white vinegar, lemon juice, meringue powder)

1 lb (about 4 cups) Confectioner’s (powdered) sugar

  1. With the egg whites in a bowl (we used the Kitchenaid), whip with an electric mixer until frothy, like bubble bath.
  2. Add the cream of tartar (or your alternative), and mix a little more.
  3. Slowly add in the powdered sugar. We went about 1/2 cup at a time. Finito! If you’re not using the frosting right away, make sure it is well covered and air-tight (tupperware, or in a closed piping bag). This frosting dries out really quickly!

Now you’re ready to start construction! We lined a tray with foil, piped frosting on the the edges of the gingerbread pieces, and after sticking all 38 pieces together, ended up with this! For decorations, we used thin black licorice ropes to emphasize some of the different long, dark windows of VLSB, as well as for the overhangs and doors. Mini marshmallows cut in half were used for the big white steps, and white Life-Savers were used for further adornment. It didn’t turn out as big or detailed as I wanted it to be (I went slightly OCD and wanted to be able to pipe the Egyptian hieroglyphs, columns, and other bas-relief sculptures, but that just didn’t work out, hehe).

For our first time making a gingerbread house completely from scratch (no graham crackers on milk cartons), I’d say we did a pretty bang-up job! Austin and Emily, you rock! This project would have been a complete mess without you!

I think it still looks awesome even without the green sanding sugar I wanted to use for the banks of grass!

So there you have it, folks! Merry Christmas from two devoted biology nerds and one awesome younger sister! We hope you have a wonderful season, spent with your loved ones, and full of delicious treats and merry festivities. Maybe that includes making a gingerbread house of your own! Have you already constructed this year’s? Post a picture of your obra de arte, or tell me in the comments below what you did to make yours special. Or are you inspired to make one of your own? Share your ideas! Do you have other Christmas or holiday traditions you’d like to share? Let me know below as well–I’d love to hear about them. :)